Last updated November 18, 2026



Free written scope consultation - allowances, timeline, and change-order rules on paper before a single trade is scheduled
Driveway & Pavers Troubleshooting in Aventura: Common Problems and How to Fix Them
Pouring polymeric sand into a sinking paver section is the most common DIY repair mistake we see in Aventura. It looks like a fix for about six weeks. Then the next heavy rain arrives, the sand washes out again, and the void underneath has quietly grown. What started as a localized base problem becomes a full-section rebuild, and the homeowner has spent money twice. The trouble is that sinking, sand washout, white haze, edge creep, and surface spalling all look like “the pavers are failing,” but each one has a different root cause and a different correct repair. Treat the wrong cause and the repair fails within a season. This guide walks you through identifying which failure mode you actually have, what causes it in Aventura’s climate and soil, and the point at which a repair stops being a homeowner job.
Quick Answer
Most driveway paver problems in Aventura trace back to one of five causes: base failure (sinking or rocking sections), joint sand washout, efflorescence (the white chalky haze), edge restraint failure (pavers creeping outward at the driveway edges), or surface spalling (the top layer of the paver flaking). Water is the common thread in nearly all of them, and Aventura’s summer rainy season is what accelerates each one. The correct repair depends entirely on which failure you have, so diagnosis comes before materials every time. If the section moves underfoot or sits lower than the surrounding field, the problem is below the surface and no amount of sand will fix it.
Styles & brands we work with
- Kitchen remodeling
- Bathroom remodeling
- Home additions & ADU
- Roofing
- Windows & doors
- Driveway & pavers
- Fence
Table of Contents
- How to Diagnose Paver Problems: A Visual Flowchart
- Sinking and Rocking Pavers: Base Failure vs. Surface Failure
- Joint Sand Washout and the Right Re-Sanding Interval
- Efflorescence: Cosmetic in Travertine, a Warning Sign in Concrete
- Edge Creep: Ficus Roots, Royal Palms, and Florida Heat
- Spalling and Surface Breakdown
- The Repair Decision Tree: DIY Reset vs. Professional Rebuild
- Preventing Repeat Problems in Aventura
How to Diagnose Paver Problems: A Visual Flowchart
Before you buy a bag of sand or a jug of sealer, walk your driveway and answer three questions. Where is the problem located? What does it look like? And what happens when you put weight on it? The answers point to one of three failure families: base failure, surface failure, or edge restraint failure. Getting this right is the difference between a repair that holds and one that reappears after the first summer storm.
Work through this sequence in order:
- Locate the problem. Is it in the middle of the field, along a joint line, at the driveway perimeter, near a garage apron, or spread evenly across the whole surface?
- Test for movement. Step on the affected pavers. If they rock, settle, or sound hollow when tapped, you have a base problem. Stable pavers with a visual defect only are a surface problem.
- Look at the joints. Missing sand, deep joints, or sand that crumbles between your fingers points to washout. Joints that are full and firm rule it out.
- Check the edges. Are the perimeter pavers pushing outward, opening gaps, or sitting proud of the field? That is edge restraint failure, not a surface issue.
- Examine the paver face. Chalky white haze wipes off with a finger? Efflorescence. Flaking, pitting, or a crust peeling from the top? Spalling.
- Trace the water. After rain, note where water pools and where it drains. Standing water near the problem area usually explains why that section failed first.
In our experience across Aventura driveways, the single most useful test is the rocking test. A paver that moves underfoot is telling you the bedding layer or the compacted base beneath it has been compromised. Sand, sealer, and surface cleaners cannot address that. Only opening the section will.
Sinking and Rocking Pavers: Base Failure vs. Surface Failure
A sinking paver section is a base failure until proven otherwise. The interlocking pavers themselves do not compress; the layer beneath them does. When a section of your Aventura driveway dips, the compacted aggregate base has either settled, been undermined by water, or was never compacted to depth in the first place. Surface failure, by contrast, is a defect in the paver face itself, and the pavers stay level and solid.
Here is how to tell them apart:
- Base failure signs: Pavers rock when stepped on, a hollow sound when tapped, a visible dip that holds water, joints opening unevenly, or a section that moves as a group when you press the edge.
- Surface failure signs: Pavers are level and solid but the face is discolored, flaking, or worn. The problem is cosmetic and stays put when you walk on it.
- Mixed cases: A driveway can have both at once, especially near a low corner where water has been pooling for years and the paver faces have also taken a beating.
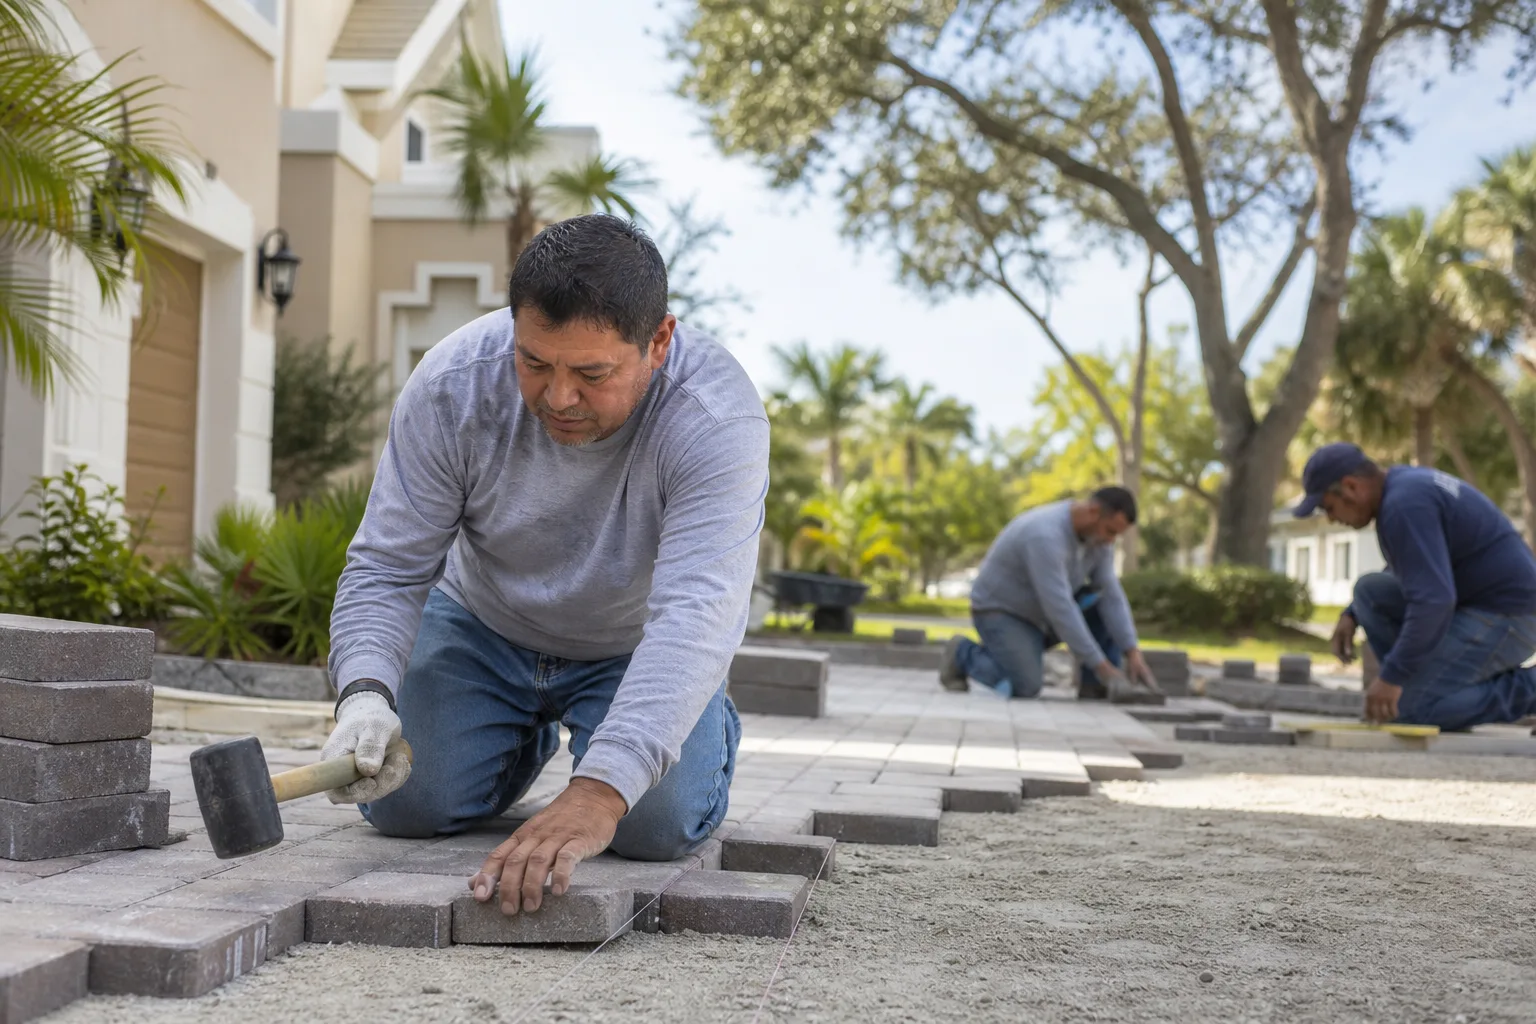
The fix for a true base failure is a lift-and-rebuild of the affected section: pull the pavers, excavate down to stable material, re-compact the aggregate base in lifts, re-set the bedding sand, relay the pavers, and re-sand the joints. Skipping the re-compaction step, which is the shortcut most DIY resets take, means the section settles again. In Aventura, where summer rain comes hard and fast, water finds any uncompacted soft spot and works it loose within a season or two.
If you are planning a larger repair or a full replacement, our driveway & pavers page covers base preparation, drainage grading, and the paver lines we install, including Belgard, Unilock, Tremron, Techo-Bloc, and Cambridge Pavers.
Joint Sand Washout and the Right Re-Sanding Interval
Joint sand washout is a maintenance cycle, not a one-time fix, and in Aventura the cycle is shorter than most homeowners expect. The sand between pavers locks them together and keeps water from reaching the base. When it washes out, the pavers lose their interlock, they start to shift, and water gets under them. On a moderately sloped driveway, expect to inspect joints after each heavy summer stretch and plan a full re-sand about once a year if the driveway sees regular use.
Flat driveways hold their sand longer. Sloped driveways, aprons near the garage, and the low side of a crowned driveway lose it first, because that is where sheet flow concentrates. Aventura’s summer rainy season delivers intense bursts rather than slow soaks, which is exactly the condition that scours joints fastest.
The right product matters as much as the timing:
- DOMINATOR polymeric sand is a solid choice for driveways with moderate slope. It sets firm, resists washout, and is available in colors that match travertine and concrete finishes.
- Techniseal polymeric sand and sealers offer a compatible system: sand for the joints and a sealer to lock the surface and slow future washout. Using both from the same line helps the sealer bond to the sand properly.
- Standard mason sand is cheaper and appropriate for older driveways with gentle grade, but it needs more frequent top-ups.
The re-sanding process itself is straightforward but picky. The joints must be dry and clean before sand goes in, or the polymeric product will not set. Sand is swept in, compacted into the joints, swept again, and then misted to activate the binder. Over-misting is the most common failure; too much water washes the binder out and you are back where you started.
Surface washout that exposes the bedding layer after every rain is a sign the joint profile is too shallow or the base is already compromised. At that point, re-sanding is treating a symptom.
Efflorescence: Cosmetic in Travertine, a Warning Sign in Concrete
Efflorescence is the white, chalky haze that appears on paver surfaces. On travertine pavers, it is usually cosmetic and manageable. On concrete pavers, it is often a signal that the sealer has failed or that moisture is migrating through the slab. The same white appearance means two different things depending on the material, and treating them the same way is where homeowners get into trouble.
Travertine pavers. This is a natural stone, and mineral salts migrate to the surface as moisture moves through it. The haze is typically a temporary phase, especially on newer installations, and it usually fades with weathering, gentle cleaning, and a breathable sealer. Aggressive acid washing on travertine can etch the surface, so the cure has to respect the stone.
Concrete pavers. A white haze here is more often a sealer problem. Sealer that was applied to a damp surface, or that has worn thin in traffic areas, traps moisture beneath the film and pushes salts up. The fix is to strip the failing sealer, clean and allow the pavers to dry fully, then reapply. That is where a Techniseal sealer system earns its place, because the stripper, cleaner, and sealer are designed to work together and you are not guessing whether the layers are compatible.
How to tell them apart in the field:
- Wipe test. Efflorescence wipes off with a dry cloth or brush. A sealer haze often does not, because it is a film bonded to the surface.
- Water test. Sprinkle water on the area. Where it beads, you have sealer. Where it soaks in, you have an unsealed or breathable surface.
- Pattern. Efflorescence follows moisture paths and often clusters in low areas. Sealer haze follows the swipe pattern of whoever applied it.
- Timing. Efflorescence tends to appear after wet weather and dry out. Sealer haze stays put.
In either case, do not assume the haze means the pavers are ruined. Diagnose first, then treat.
Edge Creep: Ficus Roots, Royal Palms, and Florida Heat
Edge creep is when the pavers along the perimeter of your driveway push outward, open gaps, and the field begins to spread. In Aventura, it usually comes from two things working against the edge restraint: roots from the Ficus hedges and Royal Palms that are so common in local landscaping, and thermal expansion from sustained summer heat.
Root pressure is the more common cause under landscape beds beside a driveway. Ficus in particular has an aggressive surface root system, and Royal Palms send roots outward well beyond the drip line. Those roots lift and push the edge restraint, and once the restraint moves, the pavers have nothing holding their outer line. Thermal expansion works differently. Aventura’s sustained summer heat causes pavers to expand and contract slightly against the restraint, and if the restraint was underbuilt or has worked loose, the edge slowly creeps.
Signs you have edge creep rather than a surface issue:
- Gaps opening at the driveway perimeter, especially along the side nearest landscaping
- Pavers at the edge sitting proud of or spread apart from the field
- A visible line where the driveway edge has pushed against a wall, curb, or planter
- Roots visible at or near the edge, or soil mounding under the pavers
Repair usually means resetting the edge restraint, re-establishing the paver line, and, if roots are the cause, removing or rerouting the root pressure. Resetting the pavers without addressing the restraint will not hold. The edge will creep again in a season. On properties where a Ficus hedge is six feet from the driveway, we often recommend root barrier and a deliberate landscape buffer so the edge does not have to fight the same battle twice.
Edge creep is also worth catching early because it opens the joint at the perimeter, and that is exactly where water gets into the base. If your driveway edge situation points to a bigger exterior project, our Construction Aventura page outlines the full exterior-to-interior scope you can manage under one relationship.
Spalling and Surface Breakdown
Spalling is the top layer of a paver flaking, pitting, or peeling away. It is a surface failure, not a base failure, and it is most often seen on concrete pavers exposed to repeated wetting and drying, or on pavers that were sealed too early, sealed when damp, or subjected to harsh chemical cleaning. On natural stone like travertine, the equivalent problem is delamination along a vein, which shows up as a flaky patch on one face.
What spalling looks like:
- A crusty layer peeling off the paver face
- Pitting that collects dirt and darkens over time
- Chipped corners where the surface has lifted away from the body of the paver
- A powdery surface that sheds when you rub it
Spalling is rarely fixable on the surface. Sealer cannot restore a face that has already failed. The practical repair is to replace the affected pavers, which is why keeping a few spares from the original installation matters. If a whole field is spalling, the cause is usually a bad batch, a sealer failure, or years of harsh cleaning, and the right move is a replacement plan rather than patching single units.
On travertine driveways, small delaminated patches can sometimes be ground and refinished, but the result is only as good as the stone allows. For both materials, the honest answer is that spalling is a material problem, and material problems are solved by material choices. This is where choosing pavers from a manufacturer with a real warranty matters. The lines we install, including Belgard, Unilock, Tremron, Techo-Bloc, Cambridge Pavers, and Oldcastle, all carry manufacturer warranties a homeowner can verify independently of anything a contractor tells them.
The Repair Decision Tree: DIY Reset vs. Professional Rebuild
Once you know which failure mode you have, the next question is whether you can fix it yourself. The honest answer depends on whether the base is involved. Cosmetic and maintenance issues are a reasonable DIY. Base and restraint failures are not, and a bad reset can cost more than the original repair.
Use this decision tree in order:
- Is the problem cosmetic only (haze, color, cleaning, joint top-off)? Yes: a homeowner with patience and the right products can handle it. Use a cleaner matched to the material and never acid-wash travertine.
- Is a paver rocking, sinking, or hollow-sounding? Yes: stop. This is a base failure. Resetting pavers without re-compacting the base will not hold, and the section will settle again after the next rainy season.
- Are the perimeter pavers creeping, spreading, or opening gaps? Yes: this is a restraint failure. It needs the edge restraint reset, which is not a homeowner job if roots are involved.
- Is the whole field spalling? Yes: this is a material failure. Replacement, not repair, is the answer, so plan the project around the paver choices you actually want.
- Is the problem isolated to one small section with solid base adjacent? Maybe: a limited reset in a genuinely stable area can be a homeowner repair, but you must open the section and confirm the base before committing.
- Has the problem returned after a previous fix? Yes: the diagnosis was wrong the first time. Bring in a professional to properly identify the failure mode.
The critical line is re-compaction. A proper repair lifts the pavers, excavates to stable material, re-compacts the base aggregate in controlled lifts, re-sets the bedding sand, relays the pavers, and reinstates the joint sand. Any repair that skips the re-compaction step is a temporary fix. It also typically voids any workmanship warranty on the driveway, because nobody can stand behind a repair that was not done to spec. If your driveway is under a workmanship warranty, have the original installer diagnose first.
When a paver driveway is part of a larger exterior plan, it pays to think about the sequence. Driveway, fence installation, and landscaping all interact, and getting a single contractor to coordinate them is far easier than sequencing three vendors yourself.
Preventing Repeat Problems in Aventura
The best repair is the one you never need. Most of the failure modes in this guide come back to water management and base quality, and both can be planned for during installation or corrected during a rebuild. Aventura’s summer rainy season is a reliable test: if a driveway is going to fail, it will show you within two or three wet seasons.
What makes the difference:
- Base depth and compaction. A driveway base compacted in proper lifts with a plate compactor is the single most important factor. Cut corners here and no amount of surface work saves it.
- Drainage grading. Water should leave the driveway, not sit on it. Surface slope, edge drainage, and how the driveway meets the garage apron all matter.
- Correct edge restraint. Once edge restraint is underbuilt, everything at the perimeter is vulnerable. Solid restraint solves root creep before it starts.
- Right joint sand for the slope. Polymeric sand on a sloped driveway, standard mason sand on a gentle one, and a yearly inspection either way.
- Sealer applied on a dry surface. Sealing damp pavers is the most common cause of the efflorescence and haze described earlier. Wait for a dry window.
- Root management. If Ficus or Royal Palms sit beside the driveway, plan for root pressure now with root barrier or landscape buffer.
For properties with an older driveway and a long-term plan, the smartest sequence is often to diagnose the failures first, decide whether a rebuild or replacement is coming, and then fold the driveway project into a wider exterior upgrade. If an ADU or addition is also on the horizon, our home additions & ADU page covers how that work can be sequenced and delivered, including prefab and modular options through brands like Abodu, Dvele, and Mighty Buildings.
Common Mistakes to Avoid
- Filling a sinking section with polymeric sand. This is the single most common mistake we see in Aventura. It hides the dip for a few weeks but leaves the base failing underneath, and the eventual repair costs more.
- Resetting pavers without re-compacting the base. Pulling pavers, sanding the base, and relaying looks like a repair and behaves like a delay. Without re-compaction in controlled lifts, the section settles again.
- Over-misting polymeric sand. Too much water during activation washes the binder out, and the joints crumble within days. Mist lightly and let the sand set.
- Sealing damp pavers. Sealing a driveway before it fully dries is the root cause of the sealer haze and many efflorescence complaints. Wait for a genuinely dry surface.
- Acid-washing travertine. Travertine paver surfaces etch under acid cleaners. Use a cleaner matched to natural stone, never a concrete-rated acid wash.
- Ignoring edge creep because the field looks fine. The gaps at the perimeter are how water reaches the base. Catching edge creep early is far cheaper than rebuilding the field.
- Replacing pavers without addressing the cause. New pavers over the same failing base, with the same roots pushing the same restraint, will fail the same way. Diagnose the cause before you replace material.
See the difference
 Before
 After
 Before
 After
 Before
 After
When to Call a Professional
Call a professional when the pavers rock or sink, when the perimeter is creeping outward, when the field is spalling, or when a previous repair has failed. Those are base, restraint, and material problems, and none of them can be solved with surface attention. Call sooner if the driveway is under a workmanship warranty, because a professional diagnosis protects that coverage. Call also if the driveway has caused a trip hazard, if water is pooling against the house, or if you are planning an adjacent project like fencing, landscaping, or an addition and you want the driveway scope sequenced correctly.
Construction Aventura offers free estimates in Aventura. Our technicians have up to 15 years of experience in hardscape and full-scope residential work, and we install from industry-benchmarked paver lines including Belgard, Unilock, Tremron, Techo-Bloc, and Cambridge Pavers. Call (833) 620-6514. We answer 24/7. Fast dispatch from 7am to 7pm, Sunday through Friday.
Frequently Asked Questions
If the pavers rock underfoot, sound hollow when tapped, or sit visibly lower than the surrounding field, the base beneath has failed and a section rebuild is the correct repair. Re-sanding or surface leveling will not fix it. Call (833) 620-6514 for a free estimate and we will diagnose the section properly.
On a moderately sloped driveway, plan on inspecting joints after each heavy summer stretch and doing a full re-sand about once a year. Flat driveways hold sand longer, while sloped aprons and low corners lose it first. Call (833) 620-6514 to schedule a joint inspection.
On travertine, efflorescence is usually cosmetic and fades with weathering and a breathable sealer. On concrete pavers, white haze more often signals a failing sealer that trapped moisture beneath the film. Either way, diagnosing first is cheaper than guessing. Call (833) 620-6514 for an assessment.
Edge creep usually comes from root pressure from Ficus hedges and Royal Palms common in Aventura landscaping, plus thermal expansion from sustained summer heat. Once the edge restraint moves, the perimeter pavers spread outward and water gets in. Call (833) 620-6514 to have the restraint and drainage checked.
Cosmetic and maintenance issues like cleaning, haze treatment, and top-off sanding are reasonable DIY. Any repair that involves the base or the edge restraint needs a professional, because resetting without re-compacting the base will fail and can void a workmanship warranty. Call (833) 620-6514 for an honest assessment.
No. We set the price per job by the written estimate, and the written estimate is what sets the final number. Unforeseen conditions are discussed before any extra work begins. Call (833) 620-6514 to schedule your free estimate and a line-item quote.
The Bottom Line
The five common paver problems in Aventura, which are sinking, sand washout, efflorescence, edge creep, and spalling, come from different causes, and treating the wrong one wastes money and time. Diagnose first: if the pavers rock or sink, it is a base failure; if the perimeter spreads, it is a restraint failure; if the face flakes, it is a material failure; and only if it is dry cosmetic haze or missing joint sand should you reach for the DIY bag. The rainy season will expose any shortcut, so base compaction and water management are the two things worth getting right the first time. With the correct diagnosis, a repair in Aventura holds for years instead of a season.
If you have a driveway problem that has come back after a previous repair, or if you are planning a larger project and want the driveway, fence, and additions sequenced under one contractor, we can help you sort the cause from the symptom. Construction Aventura offers a full exterior-to-interior scope under one contract, with the brand depth to back it up. Call (833) 620-6514 for a free estimate. We answer 24/7. Fast dispatch from 7am to 7pm, Sunday through Friday.
Written by the team at Construction Aventura.